Required Changes After Installation
Some themes such as Journal3 override the default language.twig template. Because of this, the translate button may not appear automatically after installation. Please follow the steps below to ensure proper integration.
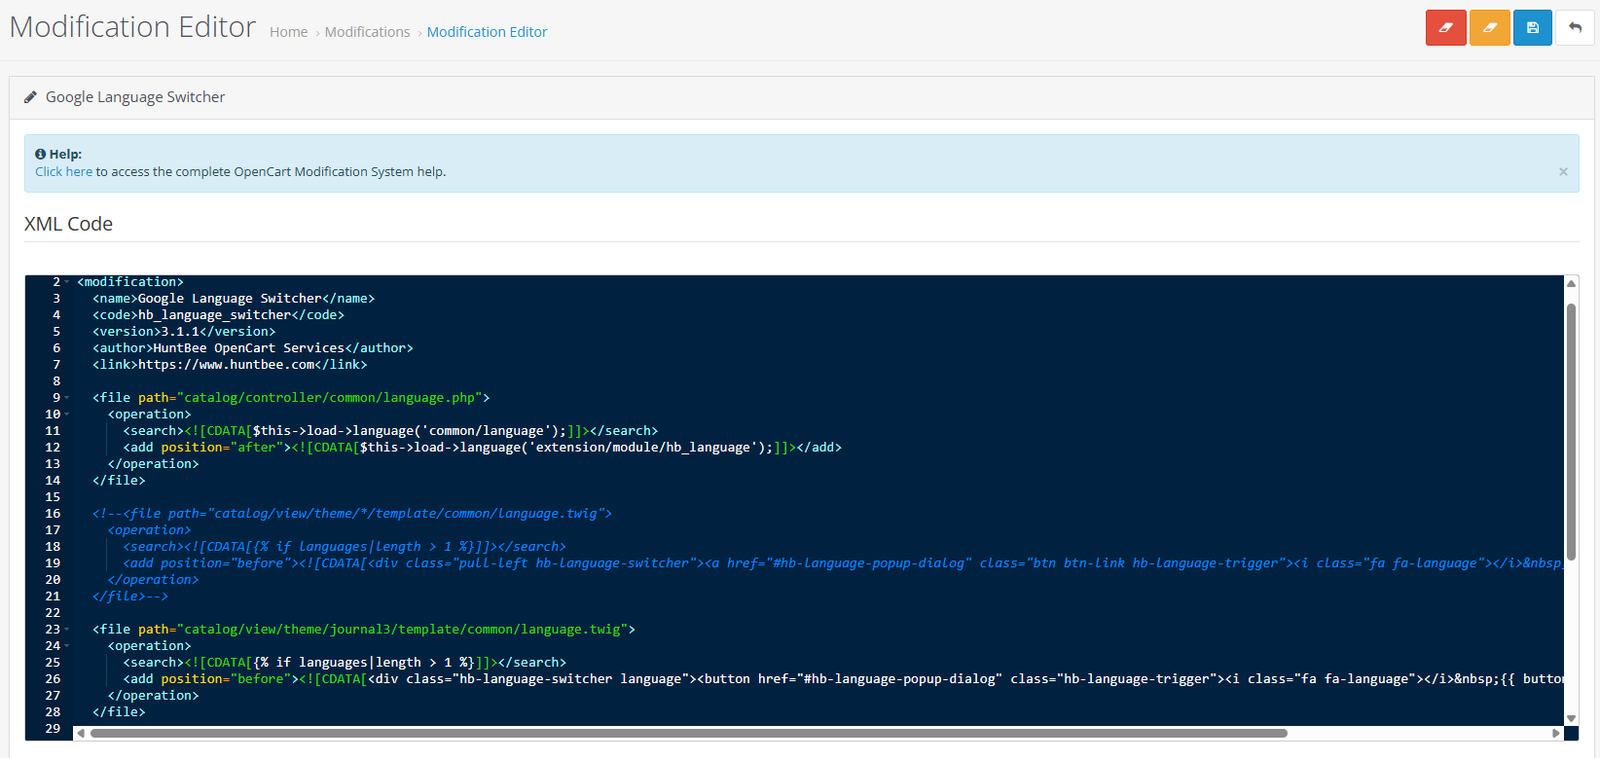
Step 1 — Edit the OCMOD File
You need to edit the modification file using OCMOD Editor.
You can install OCMOD Editor or contact support if you need assistance with these changes.
Go to:
Admin → Extensions → Modifications → Google Language Switcher → Edit
Inside the modification file, you will find a commented rule for Journal3.
- Enable the rule for Journal3
- Comment out the default rule
Follow the example shown in the screenshot.
Step 2 — Add Custom CSS
Go to:
Admin → Extensions → Extensions → Google Language Switcher → Edit → Custom CSS
Add the following CSS:
.hb-language-switcher button{
  padding: 0px 10px !important;
}
This ensures proper spacing and alignment of the translate button inside the header.
Step 3 — Refresh Modifications
After saving the changes:
Go to:
Admin → Extensions → Modifications
Click:
Refresh
Step 4 — Test
Visit your storefront and confirm:
- Translate button is visible in the header
- Popup opens correctly when clicked
- Styling looks aligned with your theme
Need Help?
If you are unsure how to edit the OCMOD file, you can contact support and the changes can be applied for you.