- Login to your Admin and go to Extensions > Installer
- Upload orders-manager-pro-x.x.x.ocmod.zip
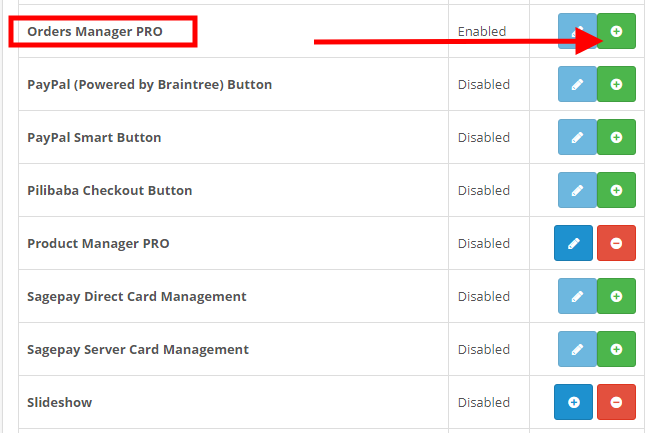
- Go to Extensions > Extensions > Module
- Look for Orders Manager PRO and click on Install button.
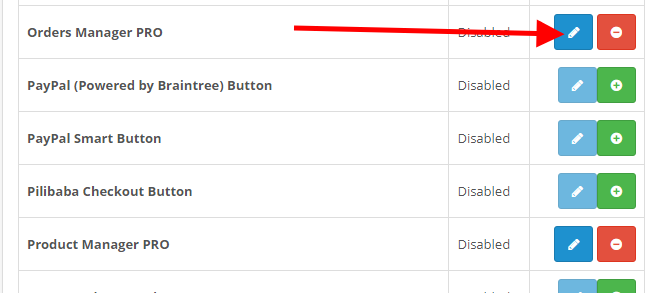
![](https://www.huntbee.com/resources/wp-content/uploads/2021/08/screenshot-localhost-2021.08.07-19_33_01.png)
![](https://www.huntbee.com/resources/wp-content/uploads/2021/08/screenshot-localhost-2021.08.07-19_37_04.png)
- Now go to Actions > Settings
![](https://www.huntbee.com/resources/wp-content/uploads/2021/08/screenshot-opencart-demo.huntbee.com-2021.08.07-19_39_18-1024x188.png)
- Enable the required Columns and complete all other settings in this page and then click on the save button.
![](https://www.huntbee.com/resources/wp-content/uploads/2021/08/screenshot-opencart-demo.huntbee.com-2021.08.07-19_41_34-1024x523.png)
- Now Go to Extensions > Modification. You will see “Orders Manager PRO” in the list.
- Click on Refresh Modification button.
![](https://www.huntbee.com/resources/wp-content/uploads/2021/08/screenshot-localhost-2021.08.07-19_43_36-1024x526.png)
- After refreshing the modification cache, you can see the menu added to the left navigation panel.
![](https://www.huntbee.com/resources/wp-content/uploads/2021/08/screenshot-opencart-demo.huntbee.com-2021.08.07-19_45_14-1024x646.png)
- Your installation is complete and you can setup the extension as per your requirement and use it.
Was this article helpful to you?
Yes
No